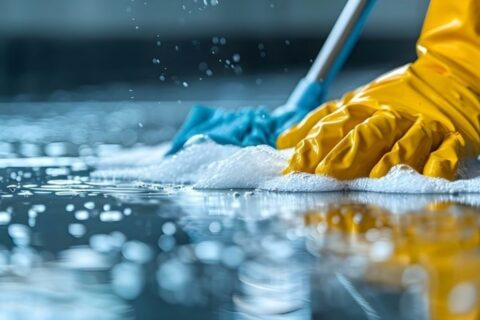

Before applying any waterproofing membrane, surface preparation matters. The walls must be free from dust, dirt, and loose particles; otherwise, the membrane won’t stick properly. Concrete surfaces need scrubbing with a stiff brush or power washing if necessary, followed by drying. Check thoroughly for cracks or holes. Small cracks might seem harmless but they expand over time as water seeps through, leading to bigger repairs. Filling these gaps with hydraulic cement before membrane application is a wise step.
Applying the membrane evenly is just as important as preparation. Many try a DIY route, which can work if done with care. Use a brush or roller to spread the liquid rubber in consistent layers. One coat rarely suffices; two or three layers build stronger resistance against leaks. Each coat should dry completely before adding the next. Skipping drying times often results in bubbling or peeling later. Keep in mind that uneven application or thin spots will allow moisture penetration, causing damp patches despite treatment.
Imagine someone who rushed the process, applying just one thin layer on basement walls. After the next storm, moisture problems persist. This scenario underlines why sticking to product guidelines is non-negotiable. Using a basement waterproofing membrane designed for these conditions helps avoid such headaches and expensive fixes.
Liquid membranes are not just for basements; they suit exterior foundations and submerged installations like pools or fountains too. Different materials call for tailored approaches, wood surfaces, for example, need priming to promote adhesion and prevent rot. A common mistake is treating all surfaces the same way, which can reduce effectiveness and shorten the membrane’s lifespan.
Temperature during application is another factor often overlooked. Applying membranes in cold weather slows curing and can cause adhesion failure. Some products specify minimum temperature thresholds for best results. If you’re working in colder months, warming surfaces or waiting for warmer days can save time and money by avoiding premature membrane failure.
Calculating how much product you need saves both money and frustration. Coverage calculators specific to the membrane type provide accurate estimates based on surface area and thickness required. It’s better to have extra than run short mid-project, which can interrupt drying schedules and compromise the seal.
Maintenance after application keeps the waterproofing effective over time. Regularly inspect walls for signs of damage or wear, especially after heavy rains. Look for peeling edges or new cracks and address them promptly. A practical habit is to mark inspection dates on a calendar or maintenance log; this helps track condition changes and plan timely interventions. Staying proactive reduces the chances of costly repairs down the road.
Protecting your foundation from moisture begins with solid technique and quality materials. A well-applied liquid membrane not only blocks water but also guards against mold and structural decay, preserving your property’s value and comfort for years to come. For detailed advice on applying these membranes correctly, visit foundation waterproofing guidance.